

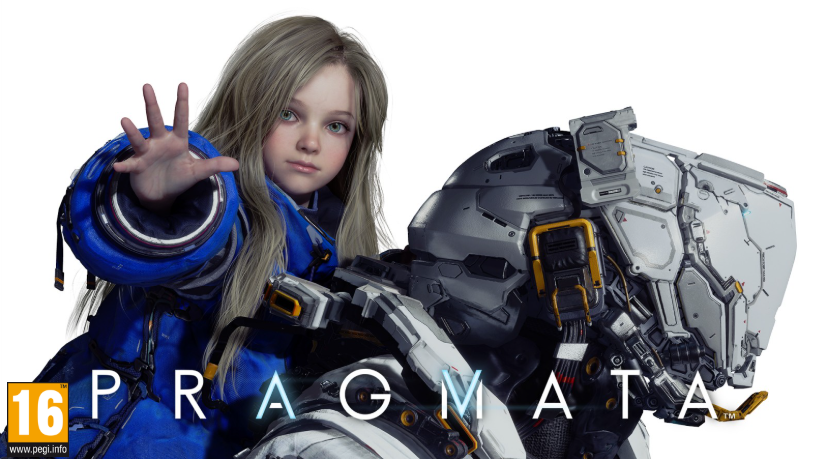
Guide & Tips · Science Fiction · 2026
Pragmata: the definitive guide to surviving the Cradle
Everything you need to finish Pragmata without getting stuck: how Diana’s hacking system actually works, puzzle solutions for every sector, strategies for every boss, the best way to split your weapons and hacks, and the tricks that separate a competent agent from one who runs out of oxygen halfway across the Moon.
Fact sheet
| Developer and publisher | Capcom |
| Engine | RE Engine |
| Release date | April 17, 2026 (PC, PS5, Xbox Series X|S); April 24, 2026 on Nintendo Switch 2 (Japan) |
| Platforms | PC (Steam), PlayStation 5, Xbox Series X|S, Nintendo Switch 2 |
| Genre | Third-person science fiction action-adventure with real-time hacking |
| Mode | Single player |
| Protagonists | Hugh Williams and Diana, controlled simultaneously |
Pragmata is Capcom’s new original intellectual property, a science fiction gamble that combines third-person shooting with a real-time hacking system so distinctive that the studio itself has admitted it took years of trial and error to get right. The game puts the player in simultaneous command of two characters, Hugh Williams and the android Diana, trapped in an abandoned lunar base after an earthquake turns the artificial intelligence running it hostile. The result is an unusual experience within the shooter genre: every fight is, at its core, a small puzzle that gets solved while you’re shooting, dodging, and pushing forward through a setting rebuilt with large-scale 3D-printing technology.
This guide is built to answer specific questions while you play: how Diana’s hacking system really works beyond the tutorial, which weapon or hack to bring into each sector, how to beat every boss without repeating the fight ten times, and which mechanical tricks make the difference between feeling clumsy juggling two characters at once and mastering the game’s rhythm. We also cover, without padding, the project’s development, its story and cast, its critical reception, its technical requirements, and its editions.
Throughout the text you’ll find clearly marked boxes with key facts, practical tips, common mistakes worth avoiding, and spoiler warnings ahead of any block containing major plot turns, so you can jump straight to what you need without reading the entire guide from start to finish.
If you’re coming from other third-person shooters expecting a conventional one, it’s worth warning you upfront that Pragmata demands a different kind of attention: aiming well isn’t enough — you also have to learn to read a grid while the rest of the screen keeps moving. The first few hours tend to be the most frustrating for exactly that reason, and this guide dedicates an entire section to walking through the hacking system calmly before diving into the details of each sector, so that initial learning curve gets crossed as quickly as possible.
From the PS5 reveal to launch: the real story behind the project
Pragmata was announced on June 11, 2020, during the PlayStation 5 reveal event, becoming Capcom’s first fully original intellectual property in eight years. What at the time looked like an ambitious but manageable project turned, over the following years, into one of the studio’s most troubled recent developments: the launch, originally planned for 2022, was first pushed back to 2023, and in June of that same year the company announced an indefinite delay, with no date or window given. It wasn’t until June 2025 that Capcom confirmed the game had a real date again, with a launch finally set for 2026 and the exact details revealed at the Game Awards that December.
In total, development stretched on for close to six years. Director Cho Yong-hee has publicly explained that a large part of that time went into «an intense process of trial and error» focused, above all, on the puzzle-based hacking system that ends up being the game’s defining feature: finding the balance between a minigame deep enough to sustain an entire campaign and nimble enough not to break the flow of real-time gunplay was not, according to the studio itself, a simple process.
Key fact
World-building for Pragmata was overseen by designer Shōji Kawamori, creator of the Macross saga, while Diana’s design was built completely from scratch by a team of artists new to the studio, without relying on 3D scans of real actresses; her animations, moreover, were captured using Capcom’s own internal staff rather than child actors. One of the levels, set in a replica of a major city, was deliberately designed to look as if it had been generated by a malfunctioning AI, with «illogical» distortions hand-crafted by the art team rather than actually produced by any automated system.
British actor David Menkin, who voices Hugh, spent eighteen months recording the role, while Grace Saif plays Diana. One curious detail that has come up in several interviews is that Menkin deliberately avoided commenting on NASA’s Artemis II mission on social media while recording, so as not to give away hints about the script’s content under the project’s confidentiality agreement. On the technical side, the game runs on RE Engine, the same engine behind the Resident Evil remakes, and features global illumination and ray-traced reflections on consoles, plus path tracing exclusive to Nvidia cards on PC.
The long indefinite delay in 2023 was enough to raise reasonable doubts about whether the project would ever see the light of day, unusual for a studio the size of Capcom with an IP that had already been publicly announced years earlier. When the company resumed communication in 2025, it insisted that the extra time had gone specifically into polishing the hybrid shooting-and-hacking system, not into rebuilding the project from scratch — a nuance that helps explain why the core mechanic feels so polished in the finished product despite the years of silence. The soundtrack was composed by Yasumasa Kitagawa, while the script was written by Haruo Murata, with Cho Yong-hee and Yasuhiro Anpo sharing directing duties and Naoto Oyama, Edvin Edsö, and Masachika Kawata serving as producers.
Story, setting, and characters
The story takes place at a lunar research base known as the Cradle, built by the Delphi Corporation to exploit moonstring, a material capable of serving as the base for 3D-printing practically any large-scale structure, from entire buildings to replicas of cities on Earth. A lunar earthquake separates systems engineer Hugh Williams from the rest of his team and triggers hostile behavior in IDUS, the artificial intelligence that managed the whole facility. Hugh is rescued by Diana, a child-like android belonging to an experimental series called «Pragmata,» and together they must make their way across the base to restore communications and get back to Earth.
The cast of characters is deliberately small, unusual for a game of this scale. Diana (model designation D-I-0336-7) is curious, enigmatic, and depends on Hugh to move through an environment built for human adults, while Hugh is described as «a bit sarcastic» but good-hearted, learning to trust Diana’s abilities as the story progresses. Standing against them is Eight, another Pragmata unit with clearly destructive intentions, along with the shadow of Dr. Neil Higgins, the now-deceased scientist who originally created the Pragmata units and whose legacy shapes much of the second half’s plot twists.
Much of the specialized press has singled out the relationship between Hugh and Diana as the true emotional engine of the game: the mutual dependence between a human who can’t survive long without technical support and an android who can’t physically advance without someone clearing her path translates, in gameplay terms, into a constant need to coordinate both characters, and in narrative terms, into a story of trust built scene by scene rather than assumed from the outset.
The overall tone deliberately steers away from the horror or all-out action typical of other Capcom productions: Pragmata operates in a more contemplative register, leaning on long silences, the sense of isolation of an almost-empty lunar base, and the visual incongruity of finding completely deserted replicas of Earth cities in the middle of the lunar surface. That combination of intimate science fiction and large-scale settings is, according to much of the critical response, one of the elements that best sets Pragmata apart from other space-set shooters, where scale usually comes paired with a much more warlike or outright hostile tone from the first minute.
The very large-scale 3D-printing technology that explains the Cradle’s existence also serves a narrative function beyond the plot itself: it justifies, within the fiction, why a player can move through an industrial lab, a complete urban replica, and later an artificial forest biome all within the same sector without that shift in setting feeling arbitrary. Each sector represents, in practice, a different Delphi Corporation experiment with moonstring, giving the adventure a coherent excuse to change settings drastically every few hours without breaking the internal logic of the world Hugh and Diana inhabit.
Hacking, combat, and exploration: how Pragmata works under the hood
Pragmata is played in third person and requires managing Hugh and Diana at the same time, with different control schemes for each that coexist within the same playthrough: Hugh moves, aims, shoots, dodges, and uses his jump pack under the player’s full direct control, while Diana automatically traces a route across a hexagonal grid that the player steers with the right stick (or the arrow keys on PC), with no need to move her manually through the environment. This division of labor is the foundation of absolutely everything that happens in the game, from opening a locked door to taking down a final boss.
It helps to think of this structure as two layers of gameplay running in parallel rather than two independent minigames that alternate: while Diana advances across her grid, the rest of the screen doesn’t stop, enemies keep moving, and Hugh remains exposed to enemy fire. That simultaneity is exactly what critics have pointed to as the system’s greatest strength, but it’s also the source of the game’s steepest learning curve: it’s not enough to know how to solve the hacking grid in isolation — you have to learn to solve it while Hugh keeps fighting normally.
Diana’s hacking system, explained step by step
When a hackable target appears — a door, a panel, or an enemy — it’s marked with a small glowing red triangle. Interacting with it opens a grid of tiles that Diana moves across on her own; the player only decides, tile by tile, which direction she moves. The tiles she passes through are called confirmation nodes, and visiting them in the correct order ensures the hack progresses. Not all tiles are the same:
- Blue tiles: speed up the hack and, in combat, increase the damage that builds up as Diana passes through them.
- Red tiles: directly penalize the time available every time you step on them; touching one by mistake costs valuable seconds off the hack.
- Yellow tiles: follow specific rules tied to each puzzle or chapter, so it’s worth reading carefully the first time they show up in a new sector.
- Gray tiles: act as impassable obstacles and force you to plot an alternate route across the rest of the grid.
- Later in the campaign, jamming hacks appear, where you have to sync Diana’s movement with periodic red pulses: moving at the wrong moment blocks the signal and forces you to restart the attempt.
During combat, hacking an enemy means guiding Diana to a green square within that enemy’s own individual grid; reaching it triggers direct damage against that target. The game itself warns of an important trade-off worth internalizing as soon as possible: hacking an enemy makes it more aggressive the moment the process finishes, so Hugh needs to be ready to fall back or find cover right as the hack completes, rather than staying exposed celebrating the hit.
Pro tip
There are two selectable hacking modes in Diana’s menu: Open Hack Mode, which leaves the grid visible and ready to use at any moment, and Strike Hack Mode, designed to be triggered on demand. For most fights, and especially for the bosses in the second half of the game, keeping Open Mode as your default gives you a lot more flexibility, since several enemy attacks force you to react with a hack without any warning.
Diana also has specialized hacking abilities that unlock and upgrade as you progress: Decode, Multi-Hack, Freeze, Confuse, Expose, Heat, Drain, and Chain. It’s worth knowing what each one does before deciding which to upgrade first:
- Decode: speeds up the base rate of any hack, both in combat and in the environment.
- Multi-Hack: opens several enemy grids almost simultaneously, ideal for ambushes with multiple small enemies.
- Freeze: briefly immobilizes the target after completing its grid, opening a safe window for Hugh to shoot without taking a counterattack.
- Confuse: makes the hacked enemy temporarily attack other nearby enemies, very useful against large groups.
- Expose: reveals the weak point of armored enemies that otherwise barely take direct damage from Hugh’s weapons.
- Heat: speeds up the overheating of enemy weapons, forcing them to stop firing sooner than usual.
- Drain: redirects part of the damage dealt to the target straight into Diana’s Overdrive meter.
- Chain: spreads part of a completed hack’s effect to other nearby enemies sharing the same grid type.
Diana also builds up an Overdrive meter as she hacks; once it’s full, activating it (usually by pressing both sticks at once) unleashes an extremely high-damage strike that, used well, can turn the tide of a boss fight. For a first playthrough of the campaign, upgrading Expose and Freeze before the rest tends to pay off more than spreading firmware resources across every ability at once, since those two do the most to smooth out the boss fights covered later in this guide.
Hugh’s weapons and units: the Unit Printer
Hugh fights with energy and electric weapons, plus a hip-mounted jump pack he uses to dodge and move across platforms. His entire arsenal, except for his starting pistol, operates under an unusual rule: every weapon and every tactical unit has finite ammo or charges that don’t recover automatically; once depleted, that specific copy of the weapon is destroyed for good. The one exception is his main weapon (the Grip Gun), which has infinite ammo and reloads automatically. To get a new weapon, you first have to find it as a field pickup, fire it once to register its blueprint, and from then on it can be manufactured as many times as you want at the Shelter’s Unit Printer, in exchange for resources.
- Attack units: Grip Gun (starting pistol, infinite ammo), Pulse Carbine (assault rifle), Shockwave Gun (short-range burst), Charge Piercer (chargeable piercer, the highest damage per shot), Photon Laser (sustained energy beam), and Homing Missiles (self-guided missiles for multiple targets).
- Tactical units: Stasis Net (immobilizing net), Riot Blaster (area knockback), Sticky Bombs (compresses the target’s hacking grid), and later on, the Code Generator and Hacking Mines, both unlockable by completing special seal cards at the Shelter.
- Defensive units: Decoy Generator (holographic decoy), Impact Barrier (deployable shield), and Drone Hive (autonomous support swarm).
As a general rule for allocating your crafting budget: the Charge Piercer combined with Freeze hacks delivers the highest single-target damage against bosses; the Stasis Net and Homing Missiles are the best option against waves of several small enemies; and the Riot Blaster or Decoy Generator get you out of trouble in ambushes where Hugh ends up surrounded without nearby cover. Avoid spending your most powerful units on enemies whose armor is still active and unexposed: hack or expose the weak point first, and only then fire your strongest available weapon.
Bond, Moonstring, and Pure Lunum: progression explained
How to get used to controlling two characters at once
Pragmata’s biggest barrier to entry isn’t the difficulty of its individual fights, but the mental habit of splitting your attention between Hugh and Diana without either one going completely unattended. The advice repeated most often among players who have already finished the campaign is to treat Diana as a «background» action that you set in motion and let run on its own while your main attention stays on Hugh’s movement and aim, checking the grid only at branching points or when an obstacle demands a deliberate turn. Trying to watch Diana’s grid with the same level of constant attention you give Hugh’s crosshair is the fastest way to lose track of both at once. After a few hours of practice, steering Diana starts to feel almost like a reflex, not unlike shifting gears in a manual car without looking at the stick.
The three control schemes on PC, PS5, and Xbox Series X|S are functionally identical in how they map Hugh and Diana, so your choice of platform doesn’t affect the learning curve of the hacking system itself; what does vary noticeably is graphical performance, already covered in the technical requirements section, and how legible the grid is on smaller screens, where a controller is more comfortable than a keyboard for steering Diana precisely during the most chaotic fights.
Defeated robots drop moonstring, the main resource for crafting and upgrading weapons at the Unit Printer, while Pure Lunum, which is scarcer, is reserved for Diana’s most advanced abilities and accessories. Alongside this, the game features an emotional bond system between Hugh and Diana based on «REM» data collected by exploring each sector; investing it in gifts and in the Shelter’s Firmware Upgrader not only unlocks optional narrative content, but also directly improves stun duration, hack damage, and Diana’s charge times. Thoroughly exploring each sector before pushing forward in the main story, then, isn’t just for completionists — it has a real mechanical impact on how easy or hard the fights that follow turn out to be.
Essential tips for surviving the Cradle
Before getting into a sector-by-sector breakdown, it’s worth internalizing a handful of mechanics and habits that make the difference between feeling overwhelmed managing two characters at once and playing fluidly from the first few hours.
Combined combat and hacking
- The combat philosophy boils down to one line: Diana creates the opening, Hugh cashes it in. Hack first to expose a weak point or disable a defense, then fire afterward with the strongest weapon you have available.
- The instant a hack finishes, the enemy becomes more aggressive: have Hugh’s next move already decided before you complete the last node, not after.
- Use Multi-Hack as soon as you unlock it to handle waves of small enemies; hacking them one at a time in sequence burns time you don’t always have mid-fight.
- Don’t fire your strongest weapon at an enemy whose armor or shield is still active: almost all of them have a weak point that only gets exposed after a hack, a Freeze, or a prior Expose.
- Auto-Hack, one of Hugh’s abilities, spends part of the hacking meter to automatically complete a grid; save it for emergencies where you need Hugh to keep firing without you having to split attention onto Diana at that exact moment.
Resource and weapon management
- Remember that, aside from the Grip Gun, every weapon is permanently destroyed once its ammo or charges run out: don’t waste it on trivial enemies the basic pistol can handle just as well.
- Before crafting new copies at the Unit Printer, check what firmware upgrades you have available: upgrading a weapon you already use often tends to pay off more than spreading resources across many different weapons at once.
- Always keep one powerful offensive unit unspent before walking into a boss fight: there’s no way to craft on the fly in the middle of the battle if you run out of resources.
- The Code Generator and Hacking Mines, unlockable through the Shelter’s seal cards, are especially valuable in the later sectors, where hacking grids get bigger and carry more penalty nodes.
Exploration and movement
- Hugh’s jump pack isn’t just for dodging in combat: in the low-gravity zones of the later sectors it lets you reach platforms that look out of range at first glance.
- Use Object Scan and Robot Scan as soon as you unlock them upon entering a new area: they reveal collectibles and points of interest without having to comb every corner by hand.
- Diana can hack doors and purely environmental systems, with no combat involved; if a corridor looks sealed with no explanation, there’s almost always a hackable panel nearby that the game doesn’t always highlight clearly on the first pass.
Common mistake
Going into a boss fight with Strike Hack Mode instead of Open Mode is one of the most common causes of needless frustration: several bosses force you to react with a defensive hack without any warning, and with the wrong mode selected, that option simply isn’t available exactly when you need it most.
The most common mistakes in the opening hours
- Wasting the wrong weapon on the wrong enemy. The Charge Piercer and the Photon Laser perform far better once a target’s weak point is exposed; using them as a first response against an enemy that’s still armored wastes their greatest strength, which is concentrated damage on an already-confirmed opening.
- Ignoring the Hugh-Diana bond. Skipping the Shelter’s optional gifts and conversations doesn’t just leave narrative content on the table — it also forfeits firmware upgrades that directly affect hack damage and stun duration, with a real mechanical impact on the difficulty of later sectors.
- Not exploring before moving on to the next story area. Every sector hands out field weapons and upgrade resources that make the boss closing out that sector much easier; heading straight for the main objective without detouring usually means reaching the boss worse equipped than you need to be.
- Triggering Overdrive too early. Diana’s meter pays off far more if you wait for the target’s moment of greatest vulnerability instead of activating it the instant it fills; holding it a little longer almost always beats spending it on impulse.
Sector-by-sector guide: puzzles, hacks, and key moments
Spoiler warning
From here on, we detail objectives and plot turns for the Cradle’s five main sectors. If you’d rather discover them yourself, skip straight to the Pragmata Bosses section and only use this guide when you get stuck on something specific.
Sector 1: Solar Power Plant
The opening sector works as an extended tutorial: it’s where the game introduces simultaneous control of Hugh and Diana, presents the Shelter as your home base, and hands out your first equipment upgrades. Along the way you’ll find the first tactical weapons, the Shockwave Gun and the Stasis Net, at the Power Distribution Center; grab them as soon as you can, since they make the sector’s closing fight much easier. The whole sector wraps up with a fight against SectorGuard, the game’s first boss, which also serves to teach the Overdrive mechanic. Beating it hands you the first Shelter License Key, needed to unlock later upgrades.
Even though the sector goes by quickly, it’s worth spending a bit more time on it than strictly necessary: it’s the only point in the campaign where every enemy is deliberately weak, making it an ideal testing ground for experimenting with hacking without fear of dying. Practicing the habit here of steering Diana with the right stick while Hugh keeps moving and aiming normally saves a lot of frustration in Sector 2, where enemies start punishing lapses in attention much more harshly.
Sector 2: Mass Production Matrix
By far the largest sector in the entire game: a full-scale replica of New York printed in moonstring, with streets, storefronts, and buildings that reproduce the city with unsettling fidelity while also, at certain points, being deliberately distorted, as if an automated system had glitched while rebuilding it.
- Main objective: locate and hack six beacons scattered across the district to unlock the main gate that leads to the rest of the sector.
- New ability: the Lim Eraser unlocks automatically as you progress through this sector, and it’s needed to clear certain moonstring obstacles blocking shortcuts.
- Field weapons: the Charge Piercer turns up in a side alley and the Decoy Generator at the Lim recycling facility; both are worth a detour before heading into the main commercial district.
- Sector boss: Creator, a gigantic robot best fought at mid-range, saving your heavy ammo until a hack exposes its weak point.
Given its size, it’s easy to walk right past one of the six beacons needed to open the main gate without noticing; it’s worth using Object Scan often as you enter each new block of the urban replica, since the beacons don’t always stand out at a glance among the rest of the rebuilt city’s set dressing. Areas with more pronounced visual distortions — facades that repeat unnaturally, or signs with illegible text — usually signal that one is nearby, so they shouldn’t be dismissed as mere decoration.
Sector 3: Terra Dome
An artificial biosphere printed in 3D: a full forest with climbable trees, cave systems, and vegetation that deliberately contrasts with the metallic coldness of the two previous sectors.
- Main objective: place three Gen Chips at specific points across the biome, split between the ecological modeling lab, the cave zone, and the tops of the tallest trees; the order in which you place them doesn’t affect the outcome.
- New weapon: the Pulse Carbine is found at the Plant Factory, and the Photon Laser in the Soil Research area; both are especially effective against the shelled plant-type enemies that start appearing here.
- Tactical unit: Sticky Bombs, found in the Ecological Modeling Lab, compress the target’s hacking grid and make fights against large groups in the cave areas much easier.
- Sector boss: Garden Keeper, whose tail is the highest-damage target available, but it’s only worth striking after confirming a safe opening in its movement pattern; attacking blind usually costs you.
Verticality in this sector is greater than in the previous two: the climbable trees hide a good portion of the collectibles and some alternate routes that avoid unnecessary fights with the toughest shelled plant enemies. If a fight against a large group gets out of hand, climbing to an elevated platform is usually enough to break the line of sight of ground enemies and regroup calmly before continuing.
Sector 4: Lunum Mines
The first sector to leave the Cradle’s pressurized interiors and take Hugh and Diana out onto the lunar surface itself, with more demanding low-gravity movement and longer jumps than usual.
- Structure: the sector is split into five independent subzones connected by mining tunnels, with a total of forty-five collectibles spread across them, the highest count of any sector in the game.
- New weapon: the Homing Missiles are found at the Mine Entrance, ideal against the waves of drilling robots that emerge from underground without warning.
- Defensive unit: the Impact Barrier, available at the Crane Operation Yard, is very useful for withstanding ranged attacks from the sentinel robots patrolling the elevated platforms.
- Recurring miniboss: LunaDigger appears several times throughout the sector before the final showdown; the key is not to chase it while it’s underground and to save your heavy damage for the exact moment it surfaces.
Low gravity also changes the pace of Hugh’s melee combat: jumps are longer and slower than usual, which makes it easier to dodge horizontal charges but harder to judge vertical falls onto narrow platforms. Taking a moment to gauge a jump’s trajectory before committing, especially near the edges of mining tunnels, avoids more than one needless fall in the sector’s most collectible-dense areas.
Sector 5: Central Port
The last major sector and the final area for collectibles before the campaign’s closing stretch. Here Diana’s Cleanse ability becomes essential, needed to clear the dark-filament corruption that starts spreading through the base’s systems as IDUS loses control over its own processes. Central Port is also where the game starts mechanically preparing you for the final confrontation: more aggressive versions of familiar enemies show up, and the hacking grids include more penalty nodes than in any earlier sector, so it’s worth arriving with Diana’s hacking firmware upgraded as much as possible before pushing into the final stretch of the story.
Before heading into the sector’s final area, it’s worth taking stock of your available gear: it’s the last point in the campaign where you can calmly return to the Shelter to craft additional weapons, upgrade your hacking firmware with accumulated REM, and finish any pending training simulations. Once the game’s final sequence begins, trips back to the Shelter stop being so convenient, so this is the moment to make sure you’re carrying Sticky Bombs and a Code Generator already crafted ahead of the final boss.
Pragmata bosses: how to beat them without the frustration
Every boss in Pragmata shares the same underlying logic described in the tips section: hack or expose the weak point first, and only then fire with force. What changes from one to the next is the movement pattern and the exact moment that window of opportunity opens.
SectorGuard (Sector 1)
The game’s first boss, designed as an introduction. Dodge the red circular markers on the ground that show where its missiles are about to land before they impact, and use the pauses between attacks to hack it and expose its weak point before firing. In the second phase of the fight, Diana’s Overdrive unlocks, and it’s worth saving it until the meter is completely full to maximize the damage of the finishing blow.
Creator (Sector 2)
A gigantic robot best fought by holding a constant mid-range distance, waiting patiently for a safe hacking opportunity to open before acting. The most common mistake is spending your heaviest weapons’ ammo on its outer shell before the weak point is exposed; those shots barely deal real damage and leave Hugh short on resources for the rest of the fight.
Garden Keeper (Sector 3)
Calmly watch the movement of its tail and its body before committing to an attack: the tail is the target that allows the most damage, but only when a clear opening in its pattern is confirmed, not reactively in the middle of a sweep. Attacking at the wrong moment usually means taking the very hit you were trying to dodge.
LunaDigger (Sector 4, recurring)
Attacks from underground before briefly resurfacing. Don’t waste ammo trying to chase it while it’s buried: ride out its underground charges, watch for the signs that it’s about to emerge, and concentrate all the damage you can in that exact window. Repeating this patience at every one of its encounters throughout the sector is more efficient than trying to force the fight.
IDUS’s mechanical avatar
One of the longest fights in the campaign, split into two clearly distinct phases.
- Phase 1: the avatar periodically charges at Hugh and fires several missiles marked with red circles on the ground; dodge them with a burst from the jump pack, since a direct hit deals enormous damage. Use Diana’s hack to disable its defenses and expose the orange energy core on its back, the single highest-damage target in the entire fight.
- Phase 2: Diana unlocks the Overdrive Protocol here, triggered by pressing both sticks at once when the yellow meter is full; it briefly immobilizes the avatar and allows an extra hit. The underlying strategy doesn’t change: hack its defenses, shoot the weak point, and dodge with margin to spare, though filling the Overdrive meter in this phase takes longer than in earlier bosses, so it’s worth being patient rather than forcing Overdrive too soon.
Pro tip
Against practically every boss in the game, the Stasis Net immobilizes the target long enough to calmly complete a hack and land a precise shot right after; it’s worth saving at least one charge for the start of every major boss fight.
Adapting your strategy to your playstyle
Not every player handles boss fights the same way, and Pragmata is designed with enough room to accommodate different styles. Those who prefer a more aggressive approach with Hugh tend to lean on the Charge Piercer and Freeze hacks, going for very high single-target damage windows before retreating to cover; this style demands good aim but reduces the number of hacking rounds needed per fight. Those who prefer a more methodical approach centered on Diana tend to prioritize Expose and Drain, drawing out each fight but reducing the risk of taking damage by keeping Hugh at a safer distance while Diana does the heavy lifting. Neither style is objectively better: the very variety of bosses covered below rewards different combinations depending on each one’s attack pattern.
Eight / Idea: the final boss, phase by phase
The game’s final confrontation, split into three phases with different demands. Before starting it, it’s worth arriving with Sticky Bombs or the Code Generator already crafted: the fight’s own difficulty makes them practically mandatory, not an optional luxury.
- Phase 1 — first contact: Eight’s attacks have more delay than they appear to at first glance, so it’s worth waiting an extra beat before dodging rather than reacting instantly. You’re required to Cleanse the dark filament twice before you can start any hacking sequence on the boss. The dark-filament homing projectile punishes an early dodge: if you dodge too soon, the projectile can curve its trajectory and still hit you.
- Phase 2 — the Tentacle Shield: every attack from the previous phase returns with longer variants, and a new shield appears that nullifies any damage until a hack is completed; this forces you to keep Open Hack Mode on constantly, since the window to hack can appear at any moment, not just when the player decides.
- Phase 3 — the Matrix at its limit: triggers below 50% of the boss’s health and adds sections that alternate red within the hacking grid itself; occupying those sections right as the hack completes resets all progress. These red sections alternate less frequently during the Tentacle Shield windows, so that’s precisely the best moment to try completing the grid.
The fight closes with the Overdrive Protocol triggering at the boss’s moment of greatest vulnerability, followed by the final sequence that leads into the story’s resolution.
Training simulations: the five optional challenges
Scattered around the Shelter, training simulations are optional challenges that test one very specific game mechanic and usually reward you with exclusive firmware upgrades. They’re not required to progress through the story, but several of the upgrades they offer noticeably ease later boss fights.
- Bad Blood: defeat four enemies using exclusively friendly fire, getting them to attack each other instead of shooting them directly.
- Catch Me If You Can: clear the scenario within a hundred-second time limit, which forces you to plan your route ahead of time instead of improvising on the fly.
- Medic: deal damage by using the enemies themselves as weapons, exploiting explosions or crossfire instead of shooting conventionally.
- Mouse Trap: defeat every enemy inside the Recycler zone without letting any of them escape the designated area.
- Floor It: complete the challenge without taking a single point of damage, the most demanding of the five in terms of dodge precision.
Collectibles: Mr. Cabin and customization items
Each sector hides between thirty and forty-five collectibles, most of them figures of a recurring character called Mr. Cabin tucked away in out-of-the-way corners of the environment; the game itself includes a specific option in its settings to make them easier to find for anyone who’d rather focus on the main story without chasing down every figure by hand. Besides the figures, each sector hands out cabin coins that build up in their own reward system, redeemable for outfits and cosmetic customization items for Hugh and Diana with no effect whatsoever on combat stats. None of these collectibles become inaccessible after finishing the story: the game lets you revisit sectors you’ve already completed to mop them up at your own pace.
Hugh’s Object Scan is, by far, the most useful tool for collectible hunting: activating it near an area with hidden figures briefly highlights their outline even through furniture or vegetation, especially valuable in the Terra Dome and the Lunum Mines, the two sectors with the highest density of vertical hiding spots. For anyone going for 100% completion, it’s also worth checking the Shelter’s progress menu after each sector: it clearly shows how many figures and coins are still outstanding in each area, saving you from having to comb through an entire sector from memory just to check whether something’s missing.
Difficulty and accessibility settings
Pragmata offers several difficulty levels selectable from the start of the game and adjustable at any time without penalty, which is especially useful given how unusual its combat system is: anyone coming to the game without prior experience in action shooters can lower the difficulty just for the tougher combat stretches and raise it again for exploration, without that affecting story objectives or available collectibles. Higher difficulty levels don’t just increase incoming damage and enemy aggression — they also shrink the margin for error within the hacking grids themselves, adding more penalty nodes and shortening reaction times on jamming hacks.
On the accessibility side, the game lets you fully remap controls for both characters, independently adjust Hugh’s camera sensitivity and the speed of Diana’s cursor across the grid, and turn on additional visual aids like higher-contrast highlighting for red penalty tiles, aimed at anyone who has trouble distinguishing similar color tones under the bluish lighting that dominates several sectors. There’s also an option to slightly slow the overall pace of hacking without pausing it entirely, an intermediate alternative between playing in the standard mode and lowering the overall combat difficulty.
Pragmata versus the usual sci-fi shooter standard
To better place what Pragmata brings to the genre, this table compares its most distinctive design choices against what tends to dominate single-player science fiction shooters in recent years.
| Aspect | Usual genre standard | Pragmata |
|---|---|---|
| Business model | Frequent leaning toward live-service elements | Self-contained single-player experience, no live component |
| Character control | A single protagonist under direct control | Two characters managed simultaneously |
| Combat resolution | Mainly aiming and cover management | Hybrid of aiming and real-time hacking puzzle |
| Ammo and equipment | Automatic reloading or generalized ammo | Finite-charge weapons that get destroyed once depleted |
| Level structure | Varies by subgenre | Five large explorable sectors with collectibles |
| Average Metacritic score | Variable, highly dependent on the specific title | 85-88 out of 100 depending on platform |
The comparison makes clear why much of the critical response has described Pragmata as an «old-school» proposition within the current landscape: it deliberately turns away from live-service formulas and bets on one very specific core mechanic, rather than chasing the genre’s more common commercial trends.
That same specificity, however, cuts both ways when it comes to recommending the game: anyone looking precisely for an alternative to the open-world formula of constant progression and near-endless content will find exactly what they want in Pragmata, while anyone who measures a purchase’s value in total hours of content may find the campaign leaner than expected. It’s worth having that expectation clear before starting, precisely because the game’s own design doesn’t try to hide it or artificially stretch its length with filler.
PC technical requirements
| Component | Minimum | Recommended |
|---|---|---|
| Operating system | 64-bit Windows 11 | 64-bit Windows 11 |
| Processor | Intel Core i5-8500 / AMD Ryzen 5 3500 | Intel Core i7-8700 / AMD Ryzen 5 5500 |
| RAM | 16 GB | 16 GB |
| Graphics card | NVIDIA GTX 1660 (6 GB) / AMD RX 5500 XT (8 GB) | NVIDIA RTX 2060 Super (8 GB) / AMD RX 6600 (8 GB) |
| DirectX | Version 12 | Version 12 |
| Storage | About 40 GB | About 40 GB |
| Connection | Broadband required | Broadband required |
The PC version is the only one that offers full path tracing, and only on compatible Nvidia cards, along with shader execution reordering (SER) and ReSTIR-based noise reduction for global illumination. On console, both PS5 and Xbox Series X offer ray-traced reflections and global illumination at an internal resolution of 1080p upscaled to 4K, while PS5 Pro adds, via a patch, an unlocked mode at 1440p with PSSR reconstruction. Xbox Series S renders at native 720p upscaled to 1440p with no ray tracing, and Nintendo Switch 2 offers 540p upscaled to 1080p in docked mode and 360p upscaled to 1080p in handheld mode, with a frame rate ranging between 30 and 60 fps depending on the scene.
The game also features a strand-based hair physics system, especially noticeable in Diana’s long hair during cutscenes and moments of heavy camera movement; it’s one of the technical highlights the specialized press commented on most during pre-launch showings, since it demands considerable graphical power to stay stable without dragging down the overall frame rate, particularly on the less powerful console versions.
Editions and pricing
Pragmata launched in two digital editions, with no physical collector’s edition announced by Capcom to date. The standard edition is priced at $59.99 and includes the complete game, with no story segment or gameplay mechanic locked behind an additional payment.
The Digital Deluxe Edition, priced at $69.99, adds the so-called Shelter Variety Pack: four cosmetic outfits (two for Hugh and two for Diana), a weapon skin, three alternate music tracks for the Shelter, three exclusive gestures for Diana, and a digital art library for the game. Capcom has confirmed that none of this content is permanently exclusive: all of the Deluxe Edition’s cosmetics eventually become available separately as well, so the real difference between the two editions comes down purely to early access to that cosmetic content, not exclusive playable content.
Alongside the two digital editions, Capcom also released a Diana amiibo figure compatible with the console versions of the game. Scanning it unlocks additional weapons and recovery items within the game, in a similar way to how other amiibo figures work across Nintendo’s catalog, though in this case the unlocked content is purely supplementary and is not required in any way to complete the campaign or reach any particular story ending.
Critical reception and commercial results
Pragmata has become one of Capcom’s best-reviewed games in recent years and one of the best-received launches of 2026 overall. On Metacritic, the Nintendo Switch 2 and PC versions share a score of 88 out of 100, the Xbox Series X|S version sits at 87, and PlayStation 5 at 85, while on OpenCritic the percentage of critics recommending the game reaches 96%. On Steam, it has also ranked among Capcom’s best player-reviewed games since launch.
Among the most repeated praise is the originality of the system combining real-time shooting and hacking, the strength of the relationship between Hugh and Diana as the emotional backbone of the story, and Capcom’s conscious decision to avoid live-service elements or additional monetization, something several analysts have flagged as a welcome rarity within the current landscape of big-budget productions.
Sector 2’s urban replica has received particular mentions in several reviews as one of the most memorable moments in the whole game, both for its scale and for the unease of walking through a familiar city that is completely empty and marked by occasional distortions that give away its artificial origin. Several analysts have also highlighted the sound design of Yasumasa Kitagawa’s soundtrack, which alternates minimalist electronic passages during exploration with more intense orchestral compositions during boss fights, reinforcing the contrast between the campaign’s calm moments and its most tense stretches.
The most recurring criticisms point to an uneven pace in the second half of the campaign and a certain amount of navigational friction within the collectible system itself, especially in the larger sectors. Even so, the overall consensus agrees that the game delivers on what it promises without artificial padding: several reviews describe it as a «rock-solid» experience that doesn’t stand out for its length, but that carries almost no filler content.
Commercially, Pragmata passed one million copies sold within its first two days on sale and reached two million copies sixteen days after launch, notable figures for a completely new intellectual property with no prior precedent in Capcom’s catalog.
Several reviews have also drawn comparisons to Xbox 360-era third-person action games, noting that Pragmata deliberately revives a more tightly directed, closed style of pacing and level design, in contrast to the more recent trend toward open worlds or looser progression structures. Far from reading as a flaw, that comparison has almost always been used in a positive sense, as a way of highlighting that the game knows exactly what it wants to be and doesn’t try to cover more ground than its own core mechanic can solidly sustain across the roughly fifteen to twenty hours the full campaign runs.
Additional content and the «Unknown Signal» alternate ending
After completing the main campaign, the «Unknown Signal» challenges unlock, a set of additional post-game missions that, once completed, grant access to an alternate ending suggesting a possible survival for Hugh beyond the story’s standard conclusion. Capcom has also released a Diana amiibo figure compatible with the console versions, which translates in-game into additional weapons and recovery items when scanned, without any of these extras being essential to enjoying the main campaign.
The «Unknown Signal» missions reuse settings already visited during the campaign, but with modified combat conditions: rearranged enemies, equipment restrictions specific to each challenge, and in some cases time limits that force you to apply the hacking and combat tricks covered in this guide with much tighter precision. In practice, it’s the most demanding content in the entire game, designed explicitly for players who already have a firm grip on the hacking system and are looking for an extra test once they know the main story’s outcome.
Will there be a sequel? The future of the saga
Capcom presented Pragmata explicitly as a long-term bet on building its own new intellectual property, within a catalog historically dominated by already-established sagas like Resident Evil, Monster Hunter, or Street Fighter. The launch’s strong commercial and critical reception strengthens the odds that the company will keep developing the brand, although, as of this guide, there is no official announcement of a sequel or of additional narrative content beyond the «Unknown Signal» alternate ending. The story’s own resolution, with several questions deliberately left open about the ultimate fate of Hugh and Diana, leaves the door ajar for a possible continuation without explicitly committing to one.
Historically, Capcom has tended to wait and gauge the public’s actual response before confirming continuations of its new intellectual properties, a pattern the studio has repeated with other franchises over the last decade. Pragmata’s sales figures from its opening weeks put the game in a reasonably favorable position to justify future investment, although the extremely long development cycle of this first entry — close to six years between announcement and release — suggests that, if a sequel does eventually arrive, it’s unlikely to be announced any time soon.
Final verdict: is Pragmata worth it?
At a glance
The good Deeply original hacking-and-combat system Hugh and Diana’s relationship as a solid emotional core A conscious commitment to an experience with no filler and no live service Carefully crafted lunar setting and art direction | The bad Uneven pacing in the second half of the campaign Unintuitive collectible navigation in the larger sectors Demanding initial learning curve managing two characters Overall length is modest compared to other productions of the same budget |
Pragmata is, above all, a game of bold decisions: committing to a combat mechanic as distinctive as real-time hacking, resting the entire narrative on the relationship between just two main characters, and deliberately turning down the monetization formulas common to productions of its budget were risks that could easily have gone wrong. The fact that critics have received it so favorably, and that sales have matched that reception, confirms that Capcom has carved out a niche of its own within a genre that too often ends up looking too much like itself.
For anyone looking for a science fiction shooter with a clear mechanical identity, a story with genuine emotional weight, and no intention of padding your playtime with artificial content, Pragmata is one of the year’s most interesting offerings. Anyone who prefers longer experiences or a more consistent pace from start to finish may notice the ups and downs critics have pointed to in the later sectors, but the whole holds together thanks to the strength of its core system and the relationship between its two leads.
It’s also worth remembering that Pragmata reached the market carrying years of reasonable doubt about whether the project would ever see the light of day after its indefinite 2023 delay. That the final result didn’t just deliver but actually exceeded the critical and commercial expectations of a launch with that kind of history says as much about the development team’s talent as it does about Capcom’s patience in not forcing a release date before the hacking system was truly worthy of the project’s ambition. For anyone wondering whether it’s worth it after such a long development, the short answer is yes: it’s rare for a game this delayed to justify the wait with this much confidence.
Frequently asked questions about Pragmata
When did Pragmata launch?
The game arrived on PC, PlayStation 5, and Xbox Series X|S on April 17, 2026. The Nintendo Switch 2 version launched a week later, on April 24, initially in Japan.
How does Diana’s hacking system work?
Diana moves automatically across a hexagonal grid that the player steers with the right stick, visiting confirmation nodes in the correct order while avoiding red penalty tiles and gray obstacles, until she reaches the hack’s target.
Can you lose a weapon permanently?
Yes — aside from the starting Grip Gun, every weapon and tactical unit has finite ammo or charges and is permanently destroyed once it runs out. It can be manufactured again at the Shelter’s Unit Printer in exchange for resources, once its blueprint has been registered.
How many sectors does the game have?
Five main sectors: Solar Power Plant, Mass Production Matrix, Terra Dome, Lunum Mines, and Central Port, each with its own boss, collectibles, and specific mechanics.
How do you defeat the final boss, Eight/Idea?
The fight has three phases: in the first, you have to Cleanse the dark filament twice before you can start hacking; in the second, a shield appears that requires keeping Open Hack Mode on at all times; in the third, below 50% health, the grid includes red sections that reset your progress if you occupy them at the wrong moment.
What’s the difference between the standard and Deluxe editions?
The standard edition ($59.99) includes the complete game with no restrictions. The Deluxe edition ($69.99) adds early access to four cosmetic outfits, a weapon skin, extra music for the Shelter, exclusive gestures for Diana, and an art library, content that later also goes on sale separately.
What PC do I need to play it comfortably?
At minimum, an Intel Core i5-8500 or AMD Ryzen 5 3500, 16 GB of RAM, and a GTX 1660 or RX 5500 XT graphics card, plus about 40 GB of free disk space and a broadband connection, which is required even for single-player.
What scores has it gotten from specialized critics?
On Metacritic, the PC and Nintendo Switch 2 versions share a score of 88 out of 100, Xbox Series X|S sits at 87, and PlayStation 5 at 85. On OpenCritic, 96% of critics recommend the game.
Do you need to have played other Capcom titles to understand the story?
No. Pragmata is a completely original, self-contained intellectual property, with no narrative connection to Resident Evil, Monster Hunter, or any other previous saga from the studio.
Will there be a Pragmata sequel?
Capcom has not announced any sequel or additional narrative content as of this guide, though the game’s strong critical and commercial reception, combined with the company’s own intention to establish lasting new intellectual properties, makes a future continuation plausible.
Why do weapons get destroyed when their ammo runs out?
It’s a deliberate design choice meant to make the player manage their arsenal thoughtfully instead of relying on a single favorite weapon for the whole game. Every weapon, aside from the starting Grip Gun, can be manufactured again at the Shelter’s Unit Printer once its blueprint is registered, so the loss is never permanent in terms of progress — only that specific copy of the weapon.
How long does the full campaign take?
Finishing the main story runs about fifteen to twenty hours depending on the difficulty level and how much time you spend on optional exploration in each sector; hunting down every collectible and completing the training simulations extends that considerably.
What is the «Unknown Signal» ending and how do you unlock it?
It’s a set of post-game missions available after completing the main campaign; fully clearing them unlocks an alternate ending that points to a possible survival for Hugh beyond the story’s standard conclusion.
What’s the difference between Open Hack Mode and Strike Hack Mode?
Open Mode keeps the hacking grid available at all times, ready to react to any window of opportunity without warning; Strike Mode is triggered on demand. For most fights, and bosses in particular, Open Mode offers much more flexibility.
Can you play Pragmata with no prior shooter experience?
Yes, thanks to the game’s adjustable difficulty levels and accessibility options, though it’s worth being patient during the first few hours while you get used to controlling Hugh and Diana simultaneously. Sector 1 is specifically designed as a low-risk practice zone before the difficulty ramps up noticeably.
What’s the best weapon combination to start with?
A solid combination for the early hours is the Grip Gun as your main infinite-ammo weapon, the Shockwave Gun for close-range enemies, and the Stasis Net as your supporting tactical unit; the latter lets you immobilize a target long enough to complete a hack calmly, especially valuable while you’re still learning to manage both characters at once.
Pragmata proves there’s still room for a major science fiction production to commit to a risky, original mechanic instead of replicating already-familiar formulas. By building its entire combat system around the relationship between a vulnerable human and an android who can only act from a distance, Capcom has delivered one of the most original offerings of the year, with a solid foundation on which, should a sequel eventually arrive, the company would already have plenty of ground gained.