
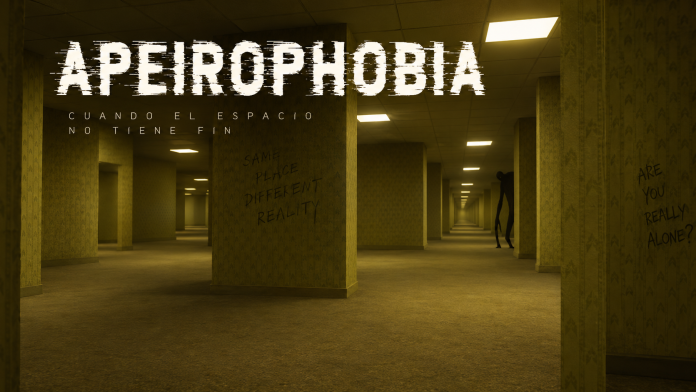
Apeirophobia Roblox: Complete Guide to Levels, Entities, Puzzles and Endings
Exploring liminal spaces, solving puzzles, finding the exit and surviving hostile entities are the keys to an adventure that combines exploration, tension, chases and cooperation.
Guide Index
- What is Apeirophobia?
- How to Play and Survive
- All Levels
- Level 0: The Lobby
- Level 1: The Poolrooms
- Level 2: The Windows
- Level 3: Abandoned Office
- Level 4: The Sewers
- Level 5: Cave System
- Level 6: !!!!!!!
- Level 7: The End?
- Level 8: Lights Out
- Level 9: Sublimity
- Level 10: The Abyss
- Level 11: The Warehouse
- Level 12: Creative Minds
- Level 13: The Funrooms
- Level 14: Electrical Station
- Level 15: The Ocean of the Final Frontier
- Level 16: Crumbling Memory
- Chapter 2
- Level 17: Left Scarred
- Level 18: Mall
- Level 19: Store
- Level 20: Neighborhood
- Level 21: Graveyard
- Level 22: Party Mall
- Level 23: Hospital
- Level 24
- Entities
- Main Puzzles
- Co-op Tips
- Mobile Tips
- Frequently Asked Questions
- Summary
What is Apeirophobia?
Apeirophobia is a horror and survival experience within Roblox developed by Polaroid Studios. Its premise revolves around exploring spaces inspired by the Backrooms, seemingly endless rooms, empty corridors, abandoned facilities and other environments designed to create a constant feeling of isolation.
The experience combines three fundamental elements: exploration, puzzle solving and survival against entities. It is not enough to simply run until you find a door. Many levels require you to observe your surroundings, memorize routes, locate objects, enter codes or interpret specific clues.
One of Apeirophobia’s main characteristics is that the game constantly changes its pace. Some levels are primarily designed around exploration, while others introduce chases, mazes, color puzzles or mechanics that require players to coordinate with one another.
How to Play Apeirophobia and Survive
Learn to Manage Your Stamina
Sprinting is an essential tool, but it should not be used constantly. Many levels have moments when you need to cover large distances quickly, and reaching those moments without enough stamina can turn a manageable situation into certain death.
A good strategy is to walk during normal exploration and save sprinting for chases or sections where you already know exactly which direction you need to go.
Listen Before Moving
Sound plays an enormous role in Apeirophobia. Some entities can detect you through noise, while others use specific sounds to announce their presence.
For this reason, playing with headphones is recommended. The official experience itself recommends using headphones to properly enjoy its horror mechanics.
Don’t Separate Unnecessarily
In co-op, four players can cover an area much faster, but they can also make mistakes if everyone does the same thing.
In puzzle levels, it is ideal to divide responsibilities: one player explores, another memorizes clues and another handles codes or checks doors.
Memorize Visual Landmarks
Apeirophobia’s mazes can look almost identical. A table, column, door, pipe or different light can serve as a landmark.
When you find an important location, remember how you got there. This habit is especially useful in Levels 3, 7, 8, 10, 11 and 14.
All Apeirophobia Levels
| Level | Area | Main Feature | Difficulty |
|---|---|---|---|
| 0 | The Lobby | Opening maze | Low |
| 1 | The Poolrooms | Valves and water | Low |
| 2 | The Windows | Linear exploration | Low |
| 3 | Abandoned Office | Sound-sensitive entity | Medium |
| 4 | The Sewers | Sewer exploration | Medium |
| 5 | Cave System | Caves and darkness | Medium |
| 6 | !!!!!!! | Chase | High |
| 7 | The End? | Puzzles and codes | High |
| 8 | Lights Out | Darkness | High |
| 9 | Sublimity | Exploration | Low |
| 10 | The Abyss | Heights and abysses | High |
| 11 | The Warehouse | Code, keys and parkour | High |
| 12 | Creative Minds | Paintings | Medium |
| 13 | The Funrooms | Party area | Medium |
| 14 | Electrical Station | Electricity | High |
| 15 | The Ocean of the Final Frontier | Ocean area | Medium-High |
| 16 | Crumbling Memory | End of Chapter 1 | High |
Level 0: The Lobby
Level 0 is the perfect introduction to the concept behind Apeirophobia. The player appears in a huge yellow space made up of almost identical corridors, artificial lighting and the constant feeling that something could be hiding around any corner.
The main objective is simple: find the exit. There is no major puzzle to solve, but the design is intended to teach one of the fundamental rules of the game: apparently simple spaces can become extremely difficult to navigate when all their elements look alike.
The best strategy is not to run around aimlessly. Use walls, corners and architectural elements as landmarks. If you are playing in a group, make sure everyone knows which direction is being explored.
Level 1: The Poolrooms
Level 1: The Poolrooms completely changes the game’s aesthetic. The player enters a huge complex of pools, wet corridors and flooded spaces.
The objective is connected to the valves. You must locate and activate the necessary valves to change the state of the area and open the path toward the exit.
The water makes movement more difficult, so avoid spending all your stamina while crossing the pools. Once the valves have been activated, pay attention to changes in the environment and look for the path leading to the next area.
How to Complete The Poolrooms
- Explore the corridors and dry areas first.
- Locate the valves before spending too much stamina.
- Activate each valve and pay attention to the sounds confirming the interaction.
- Once the objective has been completed, look for the new route toward the exit.
Level 2: The Windows
The Windows is one of the more linear levels in the adventure. Its design is inspired by the aesthetics of liminal spaces and certain representations of the Backrooms.
Here, the priority is not combat but following the correct route. Finding the right direction is much more important than searching for objects.
Move through the stairs and corridors until you reach the area containing the exit. One of the level’s visual characteristics is its windows and white corridors, which also help create an especially unsettling atmosphere.
Level 3: Abandoned Office
Abandoned Office introduces one of the first situations in which the player must seriously worry about an entity’s behavior.
The environment consists of abandoned offices, long corridors and different rooms that can appear almost identical.
The main threat is related to sound. Running unnecessarily can become a problem, especially if you do not know where the entity is.
How to Survive
Walk whenever possible and only sprint when necessary. If you suspect the entity is nearby, avoid making additional noise.
It is also important to remember which direction you came from. In this level, getting lost can be just as dangerous as the entity itself.
Level 4: The Sewers
The Sewers moves the adventure into a huge network of sewers. It is a level focused more on navigation than on chases.
Pipes, grates and corridors serve as landmarks. The main objective is to move through the network until you locate the exit.
In co-op, it is recommended to stay relatively close together. Splitting up too much increases the chances that one player will explore a dead end while the others move forward.
Level 5: Cave System
Cave System replaces the artificial environments with a much darker cave setting.
Visibility is one of the main problems. In this level, you must learn to use the available lighting without forgetting that some entities can take advantage of the darkness.
Smilers are particularly important at this stage. When one appears, do not take an aggressive approach. The important thing is to retreat and find a safe route.
Cave Tips
- Avoid moving forward without knowing where the next safe area is.
- Manage your stamina.
- Pay attention to sounds.
- Do not remain too long in dark areas when you suspect an entity is nearby.
Level 6: !!!!!!!
Level 6 represents one of Apeirophobia’s first major changes of pace. Here, exploration becomes a situation of chase and survival.
The key is to keep moving. Stopping in the middle of a corridor while the chase is active is usually a bad idea.
Sounds are particularly important. When you hear danger signals, be prepared to change direction and keep running.
Level 7: The End?
Level 7 is one of the most famous levels in Apeirophobia and also one of the ones that causes the most problems for first-time players.
The main area is a huge library where you must solve several puzzles to continue. The best-known one is the colored objects puzzle.
How to Solve the Level 7 Color Code
First, you must explore the library and count how many objects there are of each color. The relevant colors are:
| Color | Number | Priority |
|---|---|---|
| Red | 1 | 1 |
| Green | 2 | 2 |
| Blue | 3 | 3 |
| Grey | 4 | 4 |
| Yellow | 5 | 5 |
| Purple | 6 | 6 |
| Orange | 7 | 7 |
The logic is to write the number of objects first and then the number corresponding to the color. The code segments are arranged according to priority.
For example, if you find three red objects, the corresponding combination is 31. If you find four purple objects, it is 46.
You must then enter the combination into the computer. If it is correct, the game provides the code that you need to enter on the door keypad.
The Second Level 7 Puzzle
The library also contains a second challenge involving codes. Here, you must locate the available combinations and try them until you find the one that opens the corresponding door.
In co-op, this is much easier because each player can try a different combination, avoiding repeated attempts.
Level 8: Lights Out
Lights Out focuses on darkness. Limited lighting makes every movement a decision, while Smilers make staying in dark areas for too long especially dangerous.
You should not spend all your stamina at the beginning. Use short bursts of speed and stop once you have reached a safe position.
In co-op, one player can move slightly ahead and warn the others about dangers.
Level 9: Sublimity
After several intense levels, Sublimity acts as a change of pace.
The environment has a surreal aesthetic and provides an experience that is much more focused on exploration than pursuit.
Follow the visual landmarks in the environment until you find the exit. Use this level to mentally regroup and prepare for the challenges ahead.
Level 10: The Abyss
The Abyss introduces a different kind of threat: the void.
Here, the main danger is not always an entity. A poorly calculated fall can be enough to end the run.
Move carefully through narrow areas and do not automatically move toward a platform simply because it appears reachable.
The Abyss Tip
Leave some space between players. If everyone tries to jump through a narrow area at exactly the same time, a small collision can cause a fall.
Level 11: The Warehouse
The Warehouse is one of the most important levels for learning how to interpret clues.
In the first section, you will find gems of different colors. Unlike Level 7, here you must pay attention to the physical order of the colors.
The gems are used to obtain the combination required for the keypad. In this level, you must read the sequence according to the position of the gems.
Once the corresponding access has been opened, you can obtain the crowbar, which is used to remove obstacles and continue through the level.
After that, you will have to progress through the parkour section and overcome the obstacles until you reach the exit.
Level 12: Creative Minds
Creative Minds introduces a puzzle involving paintings.
You must locate the necessary paintings inside the level and pay attention to their positions. The environment gradually changes and the lighting becomes increasingly unsettling.
The best strategy is to mentally divide the map into zones. When you find a painting, remember which entrance you came from to avoid checking the same rooms several times.
Level 13: The Funrooms
The Funrooms uses a party aesthetic that contrasts with Apeirophobia’s usual tension.
The environment is filled with colors and elements designed to distract the player. This is precisely why it is easy to lose your bearings.
The key is to ignore the distractions and focus on finding the route to the exit. If you are playing in a group, try to maintain visual contact or constant communication.
Level 14: Electrical Station
Electrical Station combines exploration, industrial areas and mechanics related to electricity.
The environment may appear chaotic, but there are visual clues that help identify the correct route.
One of the important threats is associated with upper areas and ducts. Listen carefully before crossing open spaces.
In this level, it is especially important not to rush. Observe first and act afterward.
Level 15: The Ocean of the Final Frontier
Level 15 once again changes the environment and introduces an oceanic and liminal setting.
Movement across platforms and dangerous areas is one of the main elements. Jumps must be performed precisely, and it is recommended not to bunch up with other players.
If you are playing in co-op, leave enough space between characters to prevent a collision from causing a fall.
Level 16: Crumbling Memory
Crumbling Memory serves as one of the major points of tension in Chapter 1.
The environment itself is unstable and requires you to keep moving while certain sections of the terrain become unsafe.
Visual memory is essential. You must remember which areas remain stable and which ones you need to avoid.
Completing this level allows you to advance to Chapter 2, where the adventure adopts a new narrative structure.
Chapter 2: Escape From Reality
The levels introduce new locations, entities, mechanics and a more developed narrative, as well as two different routes in the hospital.
The second part of the adventure begins with Level 17 and continues through abandoned apartments, shopping malls, stores, residential neighborhoods, graveyards, rest areas and a hospital.
Level 17: Left Scarred
Left Scarred takes place in an abandoned apartment complex located near a forest.
This level introduces one of Chapter 2’s most original mechanics: the ability to modify a key.
How to Complete Level 17
At the beginning, you will find a box containing keys. Pick one up and head toward the area containing the reference that shows the correct shape it needs to have.
Use the appropriate tool to file the key until it matches the pattern shown.
If you make a mistake, you can return and obtain another key to try again.
Once the key has been correctly created, use it in the storage area. There you will find the information required to continue and access the next section of the level.
Level 18: Mall
The Mall is one of the largest levels in Chapter 2. The environment represents a huge shopping center with several floors and different areas.
Its main challenge is completing a series of Simon Says-style puzzles.
There are several terminals distributed across the different floors. You must observe the sequences and repeat them correctly.
This level also introduces the Hoax, groups of mannequins that can become a threat if you do not react correctly.
Mall Tips
- Memorize each sequence before interacting.
- Do not panic when the mannequins appear.
- In co-op, assign an area to each player.
- Check both the upper floors and the lower floor.
Level 19: Store
Store is one of the calmer levels in Chapter 2.
The environment is a large supermarket with shelves, shopping carts, freezers and changing-room areas.
The exit route passes through the supermarket area and leads toward the changing rooms. You must locate the correct route until you reach the door leading to the next level.
It is a good level to regain control after the huge Mall and prepare for the change of pace in Neighborhood.
Level 20: Neighborhood
Neighborhood takes place in a dark residential area. There is no hostile entity chasing you, so the real challenge is navigation.
The streetlights are the key to this level. You must follow the route indicated by them until you find the house that allows you to continue.
Once you find the correct house, you can continue toward the graveyard.
Level 21: Graveyard
Graveyard replaces the calm of the previous level with a much more dangerous environment.
The objective is to locate the keys needed to open the church. The keys are associated with areas of the graveyard.
Once you have the necessary keys, you can access the church.
The Church
Inside the church, you must quickly complete the objective involving the lights. Time and precision are essential.
Once the procedure has been completed, the path leading to the next area becomes available.
The main enemy in this level is the Keeper. When it appears, use environmental elements to break line of sight and avoid remaining exposed.
Level 22: Party Mall
Party Mall works as a rest area within Chapter 2.
The environment features a festive aesthetic and offers a much more relaxed pace than Graveyard.
Even so, do not let your guard down. The priority remains locating the exit and moving forward.
Use this area to regroup before entering one of the most important levels of Chapter 2: the hospital.
Level 23: Hospital
The Hospital is one of the most important levels in Apeirophobia because it introduces two different routes leading to different endings.
From the starting area, you must choose between two paths. Your choice determines which set of challenges you will have to overcome.
Right Route: Ending 1
The right route leads through a series of rooms and corridors where you must complete the corresponding puzzle before continuing.
An important part of the route involves a ventilation area. The player must use the duct to escape from the threat that appears during the sequence.
The appearance of the Titan Smiler turns the area into a chase. When this happens, your absolute priority should be returning through the duct and continuing along the escape route.
Left Route: Ending 2
The left route features a different set of challenges and entities.
Threats such as the Phaser and the Cruelest appear along this route. The latter’s behavior requires patience: when its danger mechanic is active, moving at the wrong moment can result in death.
The well area is also essential. You must complete the corresponding objective before continuing toward the next section.
Level 24
Level 24 represents the continuation of the journey after the Hospital and serves as a transition toward the final part of the experience.
The location is connected to a station and uses a different aesthetic from the residential, hospital and commercial environments found in previous levels.
This section expands the narrative and reinforces the idea that Apeirophobia is not simply a series of independent mazes, but a connected adventure tied together by a story and recurring characters.
Apeirophobia Entities
Entities are one of Apeirophobia’s main features. Each one behaves differently, meaning there is no single universal strategy for surviving them all.
| Entity | Threat | General Response |
|---|---|---|
| Smiler | Darkness | Avoid remaining exposed and manage lighting. |
| Hound | Sound | Reduce noise and move carefully. |
| Howler | Chase | Break line of sight and find an escape route. |
| Titan Smiler | Chase | Follow the escape route and use ducts when appropriate. |
| Caretaker | Unpredictable appearance | Keep escape routes available and do not relax when it disappears. |
| Hoax | Mannequins | Follow the level’s specific rules carefully. |
| Keeper | Chase | Break line of sight using walls and structures. |
| Phaser | Chase | Follow escape routes during its appearance. |
| Cruelest | Movement and reaction | Wait for the right moment and follow the specific rules of its area. |
How to Deal with the Smiler
The Smiler is one of Apeirophobia’s most recognizable entities.
Its presence is particularly associated with dark areas. The key is not to confront it, but to understand when you are entering a dangerous situation.
When you detect its presence, avoid standing still without knowing what to do. Look for a safe area, control your direction of movement and leave the area whenever possible.
How to Survive the Hound
The Hound is particularly dangerous because sound plays an important role in its behavior.
In these areas, it is better to walk more and sprint less. Making too much noise near the enemy can also be counterproductive if the sound-detection system is active.
In the shopping mall, use structures, shelves and different areas of the environment to stay out of its path.
How to Survive Chases
When an entity is chasing you, there are three mistakes you should avoid:
- Constantly looking back. This can cause you to lose control of your direction.
- Using all your stamina. You need energy for the final stretch.
- Failing to memorize the route. If you do not know where to go, running faster will not solve the problem.
The Most Important Apeirophobia Puzzles
Level 7 Color Puzzle
This is probably the most famous puzzle in the game. You must count the objects of each color and convert the quantities into numerical segments.
The basic formula is simple:
The segments are then arranged according to the color priority.
Level 11 Gem Puzzle
In the Warehouse, you must pay attention to the sequence of gem colors.
Unlike Level 7, you do not convert each color into a quantity here. The objective is to correctly interpret the physical order of the gems and transfer it to the keypad.
Level 17 Key Puzzle
This challenge requires you to observe a key model and reproduce it using a tool to file a blank key.
It is important to work carefully. If you file one section too much, the key may become unusable and you will have to return to obtain another one.
Mall Puzzles
Level 18 uses several sequence-based challenges. Memory and team coordination are essential.
Hospital Puzzle
The Hospital uses different mechanics depending on the route you choose. For this reason, you should not assume that the path for one ending will work for the other.
How to Play Apeirophobia in Co-op
Apeirophobia is particularly well suited to playing with friends. Some puzzles become considerably easier when multiple players can divide the tasks.
The Explorer
Their job is to move ahead and locate objectives, doors, keys or routes.
The Observer
Their role is to memorize codes, colors, sequences and environmental elements.
The Communicator
During chases, it can be useful for one person to concentrate on giving directions while the others focus on running.
Not Everyone Should Do Everything
The most common mistake in co-op is having four people attempt to solve exactly the same problem. It is much more efficient to divide the map and the tasks.
Tips for Playing Apeirophobia on Mobile
Apeirophobia can be played on mobile devices, but the experience changes because of the screen size and touch controls.
Use Headphones
Sound is too important to play without audio. Headphones help you detect chases, environmental sounds and entity signals.
Adjust the Graphics
If your device has performance problems, lowering the graphics quality may be preferable to experiencing stutters during a chase.
Don’t Keep Sprinting Continuously
On a touchscreen, managing stamina can be more difficult. Use sprint only when it is genuinely necessary.
The Hardest Apeirophobia Levels
| Level | Why It Is Difficult |
|---|---|
| Level 6 | Chase and constant pressure. |
| Level 7 | Puzzles, codes and navigation. |
| Level 8 | Darkness and entities. |
| Level 10 | Falls and platforms. |
| Level 11 | Codes, keys and parkour. |
| Level 14 | Industrial environment and threats. |
| Level 16 | Unstable terrain and pressure. |
| Level 17 | Key, exploration and Caretaker. |
| Level 18 | Large environment and multiple puzzles. |
| Level 21 | Keeper and graveyard objectives. |
| Level 23 | Two routes, entities and different endings. |
Mistakes to Avoid in Apeirophobia
Running Without Knowing Where the Exit Is
This is one of the most common mistakes. Speed is useless if you end up in a dead end.
Using All Your Stamina
Always keep some stamina in reserve for unexpected situations.
Separating Too Much
Splitting up can work in some levels, but doing so without communication can cause the entire group to lose track of the objective.
Ignoring Sounds
Audio is not simply an atmospheric element. In many areas, it provides important information about danger.
Not Writing Down Codes
If the puzzle requires you to count objects, write the numbers down. Relying only on memory can cause mistakes, especially during long sessions.
Frequently Asked Questions About Apeirophobia
What is Apeirophobia?
Apeirophobia is a Roblox horror experience focused on exploring liminal spaces, solving puzzles and surviving against entities.
How Many Levels Does Apeirophobia Have?
The known structure of the adventure is divided into Chapter 1, with Levels 0 through 16, and Chapter 2, with Levels 17 through 24.
What Is the Hardest Level?
There is no single answer because it depends on the player, but Levels 6, 7, 11, 16, 17 and 23 contain some of the most demanding challenges.
How Do You Solve the Level 7 Code?
You must count the objects of each color, convert each quantity into a combination of quantity plus color number, and arrange the segments according to the priority established by the computer.
Which Colors Appear in the Level 7 Puzzle?
Red, green, blue, grey, yellow, purple and orange.
Is the Level 7 Code Always the Same?
No. The number of objects can vary, so you must count the objects present in your particular run.
What Do You Have to Do in Level 11?
You must interpret the order of the gems, open the corresponding access, obtain tools such as the crowbar and continue through the parkour section until you reach the exit.
What Do You Have to Do in Level 17?
You must obtain a key, modify it so that it matches the correct pattern, use it to access the storage area and obtain the information required to continue.
What Is the Caretaker?
It is an entity that appears in Level 17 and can disappear and reappear during exploration. Its behavior means you should always keep an escape route available.
What Is the Hoax?
It is a threat associated with Level 18 and represented by groups of mannequins. It is part of the shopping mall’s specific mechanics.
What Happens in Level 23?
The Hospital allows you to choose between two different routes associated with different challenges and endings.
Can You Play Apeirophobia Alone?
Yes. The adventure can be played solo, although certain puzzles and situations are easier when several players cooperate.
Is It Better to Play with Headphones?
Yes. Sound plays an important role in numerous situations, and the experience itself recommends using headphones.
Is Apeirophobia Available on Mobile?
Yes. The official experience indicates compatibility with PC, mobile devices and Xbox.
Summary
Apeirophobia is much more than a maze game inside Roblox. Its greatest appeal comes from combining liminal spaces, psychological horror, entities, puzzles and exploration.
During the first levels, you learn the basic rules of the game: how to navigate, manage stamina and recognize threats. As you progress, the challenges become more complex, with puzzles such as the famous Level 7 color code, the Level 11 gem system and the modifiable key in Level 17.
Chapter 2 expands the experience even further with environments such as the Mall, Graveyard and Hospital, where decisions carry greater weight and different routes become available.
The Keys to Completing Apeirophobia
1. Do not run without knowing where you are going.
2. Always keep some stamina in reserve.
3. Listen to the sounds around you.
4. Learn how each entity behaves.
5. Write down codes and quantities during puzzles.
6. Learn the safest routes through the most difficult levels.
7. During chases, prioritize survival over exploration.
8. In the Hospital, remember that your initial choice determines the route.
If you learn the rules of each level instead of trying to complete them simply by running, the adventure becomes much more manageable.